|
Present It's been a busy month since the first gathering of the PCG. Andres's table has been finished and he's making holograms again (hopefully he'll get some pictures going soon), I've been making hologram copies left and right. I've made several copies of the PCG silver hologram for the attendees as well as experimenting with copies from older masters. Some H2 pictures are shown below.
I've got a bit of time to do some writing on the other holographic testing I've been doing lately, so here goes... I had purchased a new box of PFG-03M a few months ago and finally had some time to try them out again. My previous results were not so hot but I wanted to give them another shot now that the plates are packaged in plastic-lined paper. I had some JD4 already mixed up so I got my processing station ready to go and used the Enterprise master that was waiting on the table. Using Wler's handy exposure chart for PFG-03 I determined that the exposure should be about 6 seconds. I positioned the H2 holder so the image would be centered and moved a few blocker cards so the edge of the plate would be shielded from the reference beam. For the first shot I let the table settle for 15 minutes (most likely not necessary but it the amount of time I commonly use) and exposed for 6 seconds. After exposure I mixed the JD4 A&B together and poured it into my developing tray and dropped the plate into the solution. The edges of the plate went dark almost immediately, forming a dark ring around the center. Not good. This is the same thing I had happen with the last batch of plates. After 60 seconds of development the center hadn't gone as dark but I took it out of the developer just the same. Rinsed it using two different 1L buckets and then bleached. After the bleach I took it into the bathroom to rinse the plate under running water. I immediately noticed that something was odd about the emulsion. It looked like it was all kind of bunched up in a ring around the center of the plate. I took a closer look and found that there was no emulsion at the center of the plate and it was indeed all bunched up in a ring. It's as though the emulsion had sloughed off during manufacture.
Once the plate was dry I found that no image was visible anywhere on the plate, even in the bunched up areas. For the second plate I used the same settle and exposure times but checked the plate to make sure there was emulsion on it. There was. After exposure I dropped the plate into the developer and again, an outer ring went dark almost immediately. This time though, an inner circle slowly began to darken. This happened much faster than PFG-01 but slower than I had expected. After rinsing, bleaching, more rinsing and finally a running water rinsing I took the plate and tried to find the transmission image. It was very faint, indicating underexposure/development. Ok, this time I increased the exposure to 10 seconds (which I'd used for the last PFG-01 copy of the Enterprise) and ran through the process again. I also increased development to 110 seconds so that the final hologram was nice and dark. After bleaching and rinsing I again looked for a transmission image and this time saw something reasonably bright. After both holograms had dried, I was stunned to find that neither had dried evenly. There were streaks and splotches all over both and while I could see my hologram, both images looked horrible. I'll post some pictures soon. So far I'm not too enthused about the PFG-03M results. The plates show clear fogging around the edges, the same as the last batch, which reduces the usable area to a 3" circle in the middle of the plate. I'm not going to give up though, if I can get a clean image in the middle I'll consider the experiment a reasonable success. Several months go Dinesh gave me some BB640 plates to test with so that I could not only test them but also write up my results. I didn't have time right then and shortly after my lab was taken apart so I could rebuild the table. Now that the table's done and performing well, it was time to give the BB640 a try. For the first test I used the Enterprise master and started out with a 15 minute settle and 5 second exposure. I used JD4 to develop the first test and the plate went dark very slowly. I pulled it out of the developer after 110 seconds and ran it through the bleach rinse cycle. Once out of the final rinse I looked for that telltale transmission image and saw nothing at all. Thinking that the first plate was likely underexposed I put another one in the holder and set up for a 10 second exposure. This one was only developed for 80 seconds as it seemed to reach the desired density after that time. After the bleach/rinse cycle I was able to see a relatively faint transmission image. For the third and final test (only three plates were available for testing) I increased the exposure to 20 seconds and increased the development to 180 seconds. This time I saw a reasonable strong transmission image after bleaching and rinsing. The holograms were left to dry and once they'd done so I saw no image at all with the first plate. Since there was no transmission image, I expected that. In the second plate I saw a dim but not too bad image of the Enterprise. The third plate came out brighter but not an ideal image.
I decided to try the PFG-03M again this morning. I think I've figured out why the emulsion came off the plate during my last session. I may have soaked the plate in distilled water before putting it in the developer. I do this normally with film and it's a step that often given in the literature for making sure that the developer acts evenly on the film. I definitely did that on the first plate of this session and ended up with a lot of missing emulsion when the plate came out of the bleach bath.
For the second plate I skipped the pre-dev soak and didn't have a problem with emulsion coming off. Unfortunately I also didn't have anything worth taking a picture of. The second plate very quickly turned black in a ring around the center of the plate. After 60 seconds I took the plate out of the developer, rinsed it and put it into the bleach. Unfortunately I still had a ring of dim image in the middle, a brighter image ring just outside of that and where the plate turned black immediately, nothing.
Beach Holography anyone? After hearing John Klayer's talk about cave holography during the first PCG Gathering and hearing about Dr. Jeong's holography demonstrations on a beach I decided that I'd try some beach holography of my own while wifey and I are in Belize. I've been gathering the materials I think I'll need which includes small travel-sized bottles for developer and bleach, a couple of new laser pointers to take apart, wire clips, gloves, tongs, a desktop tripod, small film holder (glass sandwich), 3x3" film and a small compartmented box to carry all that in. Yesterday I picked up a couple of cheap laser pointers at Target. One was a simple bullet-shaped pointer and the other was a combination pointer and flashlight. Oddly enough the combination one was a couple of dollars cheaper than the laser-only pointer. After taking the combination pointer partially apart I determined that I wouldn't be able to get the laser module all the way out without risking destruction of the whole thing so I switched to working on the other pointer. It turned out to be a much easier task as the pointer is about as cheap as it could be made. It's a bare diode (no can) soldered onto a small pcb along with the driver circuit and a switch. Unfortunately I ended up losing the collimating lens while taking the front housing apart. The lens was held away from the diode by a spring and when I'd removed enough of the front it launched the lens across my office. Fortunately I didn't really want the lens as I was interested in using the the clean raw beam from the diode. The next step was to add some wiring so that I could power the module from batteries and turn it on/off using external switch.
I then hot-glued the module to a mount that could be easily screwed onto the desktop tripod. I didn't want to modify the tripod since I'll actually be using it with a camera at other times. This setup isn't intended to be permanent since I still need some larger batteries (maybe) and I need to tidy up the leads.
Next up was the plate holder. I had some old 4x5" glass that I recycled, taped the edges so that I had a decent window for a piece of 3x3" film and then taped the two pieces of glass together. When in use I'll hold them together with two binder clips.
Next order of business was to set up a test on the table. For this I tried to mimic (excluding the use of the pretty glass) a setup that I might be able to do on a beach. The subject is a star fish and the plate holder is supported by both the subject and some sticky tack. The laser diode illuminates the entire plate at about 50 degrees. The meter says I'll need a 4 second exposure and my shutter will be the classic method of using a black card in front of the laser.
The first test didn't come out well for two reasons:
The second test still showed some movement so I switched out the sticky tak for some magnets. The third test was kind of dim but everything was visible. I'll have to try again tonight or in the morning or perhaps more likely just on the beach.
Crystal Paradise, Cayo, Belize (the notes below were taken at the time the hologram was made) Tonight I'm going to attempt a hologram (now that we've got our tripod back)
outside our cabana. Now for the new notes... After taking the film back inside I set about figuring out how I was going to develop this puppy. I decided to take the plastic boxes (see below) apart and use the bottoms as trays. Carrying everything into the bathroom, I set about measuring out the developer using an old drink bottle as my measuring cup. I didn't use it because it had any sort of markings that would let me measure precisely, but only because it could be thrown away afterwards. Since I only needed to measure out equal amounts of parts A and B I could easily do that by eye. So I did that and set out the trays while rinsing the hologram. The light coming into the bathroom was a little more than I needed to see but didn't fog the film much. After rinse, I dropped the film into the developer for two minutes and then back under the water for my "stop". After bleaching I rinsed it again, toweled it off and set it aside to dry while we slept.
The finished holograms are shown below.
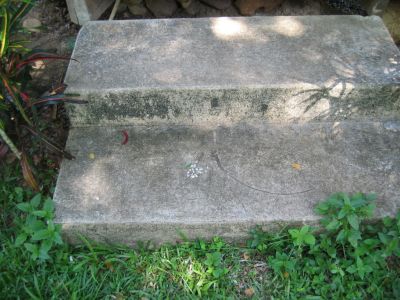
Pelican's Pouch, Southwater Caye, Belize It was time to make another hologram or two. Because it was so windy I borrowed a hammer and some corrugated steel from Altan, the manager of the property and set about making a windbreak. I had a bit of trouble finding a spot that wasn't in direct moonlight, which was quite bright tonight and was somewhat shielded from the wind. I settled on using the picnic style benches out front of the main house and leaned the steel against the bench, slightly under the table, to provide some shelter from the wind and additional shelter from the moonlight. While all this searching and deciding was going on, I'd set up the laser on the bench to allow it to warm up and that had naturally attracted a bit of attention. I was happy to explain what I was doing. I scooped out a bit of sand so that I could lay down an urchin shell, some coral and a clam shell and leave enough room to set the film down on top. I used some pieces of thin concrete (don't know what they'd been used for before) to provide some registration points for the film holder and put the blocking card in place. I then got a piece of film out of the package, put it into the film holder, put on some binder clips and set the holder down on top of the subjects. I waited two minutes and exposed the first piece for 8 seconds. I repeated the procedure with a new piece of film and exposed for 10 seconds. At this point I had two pieces of exposed film ready for developing and no place decided for that to happen. We were staying in the main house this night and the showers were conveniently located nearby so I decided to use one of those. I set up the flashlight so it would provide just enough light and using the same methods for the last session, set about developing the holograms. This time though I was able to get away with 60 second developing times. Unfortunately I had varying amounts of film movement with all these holograms but I've also ended up with clear images where the film didn't move. I'm going to count this a success and definitely do this again some day.
Present |


Use this form to send us your questions or comments about this web site or the products featured here.
Copyright (c) 1996-2015 Dragon's Eye Software, All Rights
Reserved.
All trademarks are owned by the respective company, Dragon's Eye Software or
Dragon's Eye Creations
Last modified: Monday, April 21, 2008